
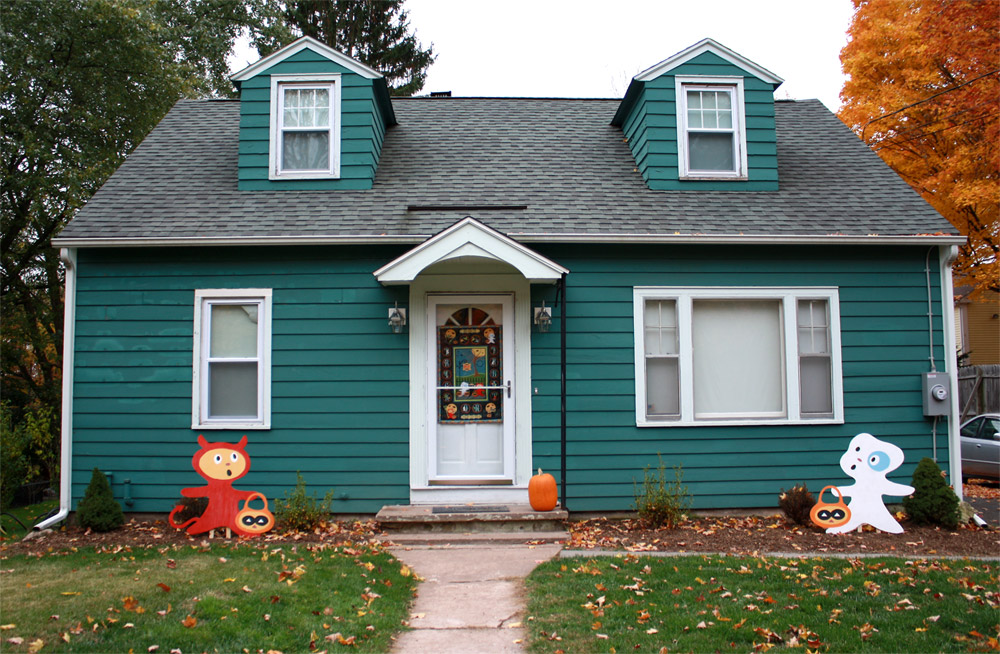
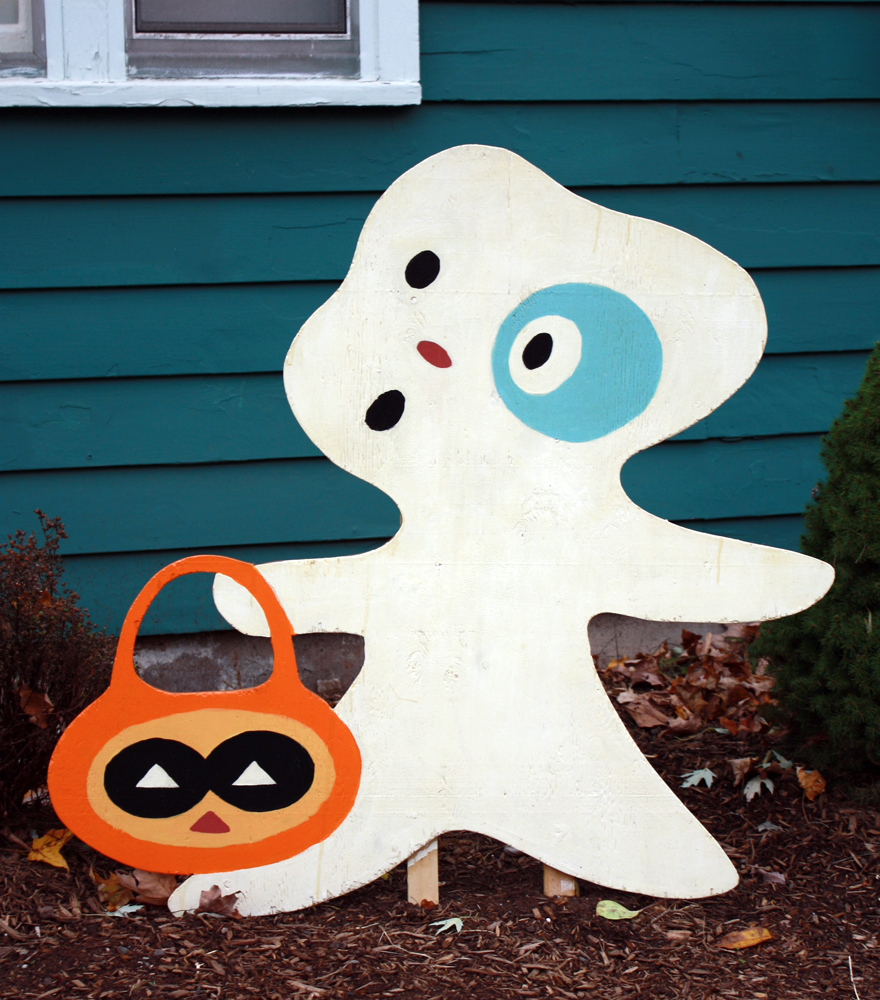
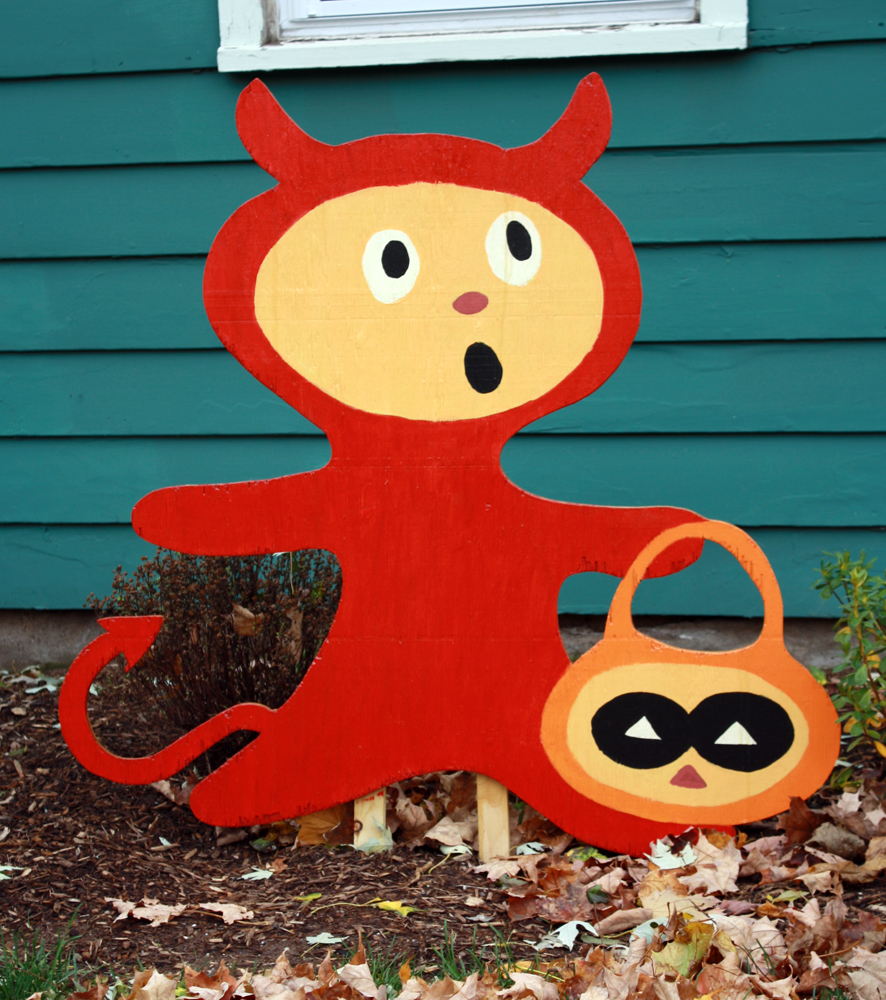
Aren't they adorable? Originally my plan was to make a Scooby Doo scene, but since we were already into the month of October I decided to go with these characters instead.
Supplies
1/2" Finished plywood (Cheap plywood will splinter like crazy so buy the good stuff)
Transfer paper
Paint
Primer
Outdoor clear coat
Conduit
Two hole conduit straps
Screws
Wood filler
Tape
Paper
Pen/Pencil
Safety glasses
Tools
Jig saw
Drill
Step 1: The first step is to settle on a piece of artwork. (If you are a beginner it is best to stick with a simple design. Intricate designs require a steady hand, and a lot of patience and jig saw work.)
Step 2: Print/create your artwork using the dimensions you want your finished piece to be.
You have three options: Freehand your work right onto the plywood.
Use Illustrator to create or trace your artwork and then print it using the tile feature.
Or find a line drawing and enlarge it using a copier.
Step 3: Fill any holes, cracks or gaps in your plywood with wood filler. Once dry give a light sanding. Repeat until you have a nice even finish.
Step 4: Give your plywood a couple of coats of primer. A good shellac-based primer will hide knots and wood-grain. But latex primer, which is what I used, will work just fine too.
Step 5: After your primer has dried, tape transfer paper to the plywood and then tape your design on top of the transfer paper. Trace over the design with a pencil or pen.
Step 5: Put on your safeties and cut out design with jig saw.
Step 6: Sand rough edges (if needed). Then touch up any areas that may have chipped with primer.
Step 7: Now it's time to paint. I used acrylic paint from the craft store (this required many coats). FolkArt makes an outdoor acrylic. You can also use exterior house paint, however if you need a lot of colors that could get pricey.
Step 8: Once you are completely satisfied with the way your piece looks you must clear coat it with an outdoor sealer to protect it from the elements. (I used Minwax Outdoor ClearShield which was a mistake because it gave my beautiful white ghost a yellowish hue.) If you have a lot of white in your design it is better to go with a non oil-based product. Oil-based products will give your whites a yellowish look.
Make sure to go over your piece with 2-3 coats and cover the front, back and sides.
Step 9: Attach conduit to the back with straps and wood screws. You should sink the conduit into the ground at least a foot.
No comments:
Post a Comment